Table of Contents
In this article, you’ll learn how make a Blinking of led using Aurdino Uno for every 500ms. In arduino uno, a LED has already inbuilt at the pin13, but we are not going to use it.
Components Required
Hardware: Arduino uno board, connecting pins, 220Ω resistor, LED, breadboard.
Software: Arduino Nightly
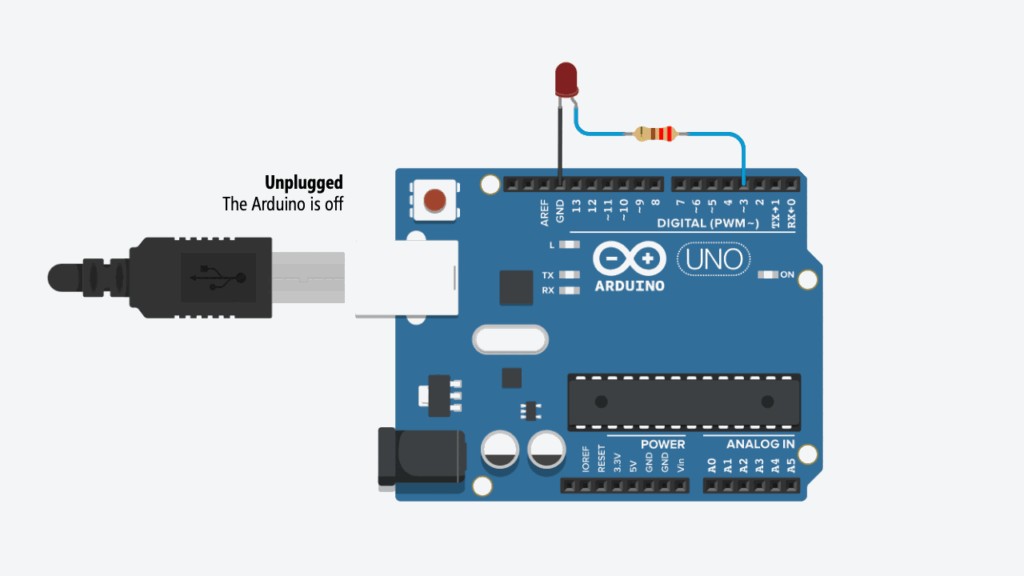
Circuit
Here we are going to connect an indicating LED to PIN7 through a current limiting resistor.
The controller in arduino is already programmed to work on external crystal. So we need not to worry about fuse bits or anything. The arduino works on 16Mhz crystal clock, which is already embedded in the board.

Code for Blinking of led using Aurdino Uno
Code
// The setup function runs when you press reset or power the board

void setup()

{

 // initialize digital pin 0 as an output.

pinMode(3, OUTPUT);

 }

// the loop function runs over and over again forever

void loop()

{

digitalWrite(3, HIGH);   // turn the LED on (HIGH is the voltage level)

delay(500);              // wait for a second

digitalWrite(3, LOW);    // turn the LED off by making the voltage LOW

delay(500);              // wait for a second

}
Explanation of Blinking of led using Aurdino Uno Code
Above code controls an LED (Light Emitting Diode) connected to the board. Let’s break it down step by step:
1. setup() function:
- This function runs only once when you start the Arduino or press the reset button.
- Inside
setup(), the linepinMode(3, OUTPUT);configures pin number 3 on the Arduino board to be an output pin. This means the program can control the voltage level on that pin.
2. loop() function:
- This function runs repeatedly, creating a loop that keeps the program running.
- Inside
loop(), two lines control the LED:digitalWrite(3, HIGH);sets the voltage on pin 3 to HIGH. In Arduino, HIGH typically corresponds to 5 volts. This turns the LED on.delay(500);pauses the program for 500 milliseconds (half a second).digitalWrite(3, LOW);sets the voltage on pin 3 to LOW (usually 0 volts). This turns the LED off.- Another
delay(500);pauses again for 500 milliseconds.